Monday, September 27, 2010

MG Deathsycthe Purchase

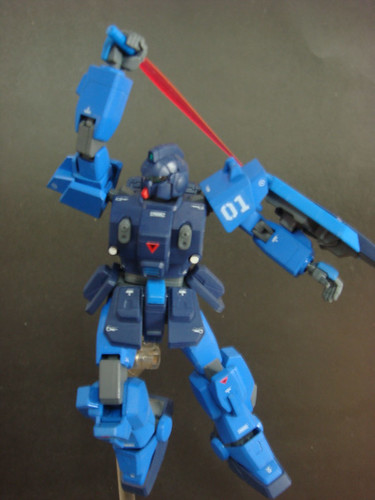
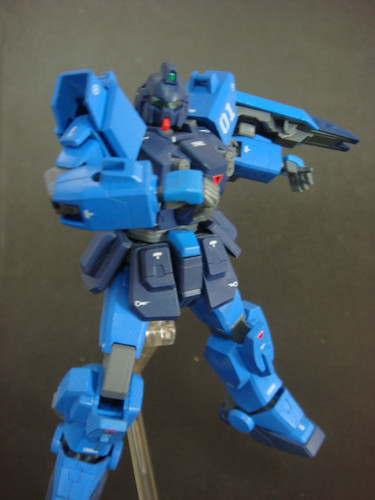
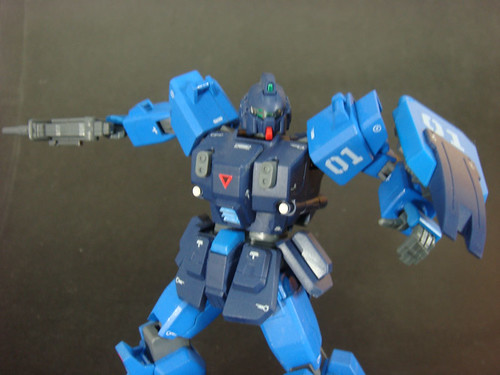
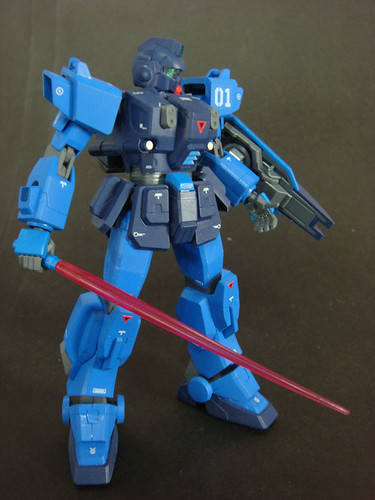
Made a quick visit to the hobby store and got myself the MG Deathsycthe.

The instructions look pretty basic. This would probably take a day or two to assemble, provided the nub marks would be easy to clean.

I've also finished assembling the main unit of the MG Destiny. I'd probably assemble the wings and weapons after I have finished the MG Deathscythe.

I guess this means I'm officially on a High Grade hiatus after getting two MG Kits. I was planning on getting the HG QanT, but after the MG announcement I decided I would wait for November to get the bigger guy. My next HG purchase would probably be the HG Sinanju. I've been eyeing the HG Unicorn for quite some time now so I guess I'd buy the rival units when Sinanju comes out.

Sunday, September 26, 2010

HG GN-X


Here it is! My very first airbrush project is finally done. I was actually able to finish painting this kit almost two weeks ago. I got very busy so I wasn't able to finish it right away.

Since this is my very first time to airbrush, there are lots of room for improvement. The inner parts of the kit were painted in gray. It got pretty thick because I actually applied 3 different layers of gray until I was satisfied. Painting on the black parts were delayed too because I ran out of paint. The purple was done by mixing red and blue, and a bit of white to make it lighter.

I'm dealing with a lot of paint scratching with this model. At first I was using the Tamiya thinner for acrylics, then I decided to use 70% Isopropyl Alcohol for the purple. The purple was very flat, so I guess what they say about Isopropyl alcohol giving off a flat finish was true. It dried off pretty quickly too, and it only took a few coats to get the desired effect. The paint with the Tamiya thinner takes a bit of time to dry up, and the coating was thicker compared to the IA. I don't know, maybe the paint to thinner ratio I did was incorrect.

After the paint has dried, I left the parts on my old computer desk and waited for them to totally cure before topcoating. I wasn't able to topcoat right away and the parts were attracting dust/lint. I did the topcoating yesterday, and I was recovering from a mild fever. I bought a Bosny clear acrlic spraycan. I transferred some of it in a tamiya glass jar. I wanted to apply it using my airbrush, and mix it with IA to fight off the glossy effect.

To avoid flooding the page with a single post, I decided to post my albums in Multiply. You can view the rest of the pictures HERE. Please comment here, or in Multiply if you do have an account =)


Sunday, September 12, 2010

Quick Udpate 09/12/10

My cam's memory card is being a pain in the you-know-where again. Many WIP photos for this update was deleted. Anyway, here is a quick update.

I'm currently building MG Destiny, and I'm almost done with the first airbrush project which is the HG GN-X. I forgot to mention before that I already sold my MG Victory. I needed the cash, and I had no time to finish it.

Practicing with the airbrush has been fun. I'm still trying to get used to mixing paint, coating the part, etc. I have also realized that masking is a huge pain in the, again, you-know-where. I also practiced seam removal as you can see below.

Still has room for improvement. I just hope that I can get used to these tricks just in time for the Gunpla World Cup. Still not a hundred percent sure if I will join.

I'd probably be done painting the GN-X by tomorrow. Then hopefully, the review will be out before the week ends.

Thursday, September 09, 2010

Bandai Model Kit World Cup 2010

Got this in my mail today! The info for the Philippine leg of the model kit contest.

BANDAI MODEL KIT WORLD CUP 2010
GUNDAM REGIONAL FINALS
EASTWOOD MALL ATRIUM, LIBIS QUEZON CITY
NOVEMBER 5 TO 7, 2010


I- PRIZES AT STAKE:

PROFESSIONAL:

Open Category:

1ST Place:

· Medal, certificate & Gundam showcase worth P 15,000 inclusive of limited Gundam and will be the official representative of the country in BANDAI MODEL KIT WORLD CUP 2010 Finals on December 2010 in Hong Kong, with free 1 round trip ticket and accommodation.

2ND Place:

· Gundam showcase worth P 12,000 inclusive of limited Gundam item, plus medal & certificate

3RD Place:

· Gundam showcase worth P 9,000 inclusive of limited Gundam item, plus medal & certificate

Junior Category:

1ST Place:

· Medal, certificate & Gundam showcase worth P 6,000 inclusive of limited Gundam item and will be the official representative of the country in BANDAI MODEL KIT WORLD CUP 2010 Finals on December 2010 in Hong Kong, with free 2 round trip ticket and accommodation.

2ND Place:

· Gundam showcase worth P 5,000 inclusive of limited Gundam item plus medal & certificate

3RD Place:

· Gundam showcase worth P 3,000 inclusive of limited Gundam item plus medal & certificate

NEW CHALLENGER:

Open Category:

1ST Place:

· Gundam showcase worth P 9,000 inclusive of limited Gundam item plus medal & certificate

2ND Place:

· Gundam showcase worth P 6,000 inclusive of limited Gundam item plus medal & certificate

3RD Place:

· Gundam showcase worth P 3,000 inclusive of limited Gundam item plus medal & certificate

Junior Category:

1ST Place:

· Gundam showcase worth P 4,000 inclusive of limited Gundam item plus medal & certificate

2ND Place:

· Gundam showcase worth P 3,000 inclusive of limited Gundam item plus medal & certificate

3RD Place:

· Gundam showcase worth P 2,000 inclusive of limited Gundam item plus medal & certificate

EXPERT CATEGORY:

1ST Place:

· Gundam showcase worth P 10,000 inclusive of limited Gundam item plus medal & certificate

2ND Place:

· Gundam showcase worth P 8,000 inclusive of limited Gundam item plus medal & certificate

3RD Place:

· Gundam showcase worth P 6,000 inclusive of limited Gundam item plus medal & certificate

GROUP CATEGORY:

1ST Place:

· Gundam showcase worth P 10,000 inclusive of limited Gundam item plus trophy & certificate

2ND Place:

· Gundam showcase worth P 8,000 inclusive of limited Gundam item plus trophy & certificate

3RD Place:

· Gundam showcase worth P 6,000 inclusive of limited Gundam item plus trophy & certificate

SPECIAL CATEGORY:

Best Sangokuden entry

Consolation prize (4th to 8th place)

PROMO MECHANICS:

II- The contest is open to all Gundam enthusiasts except employees of Bankee Trading Inc. their advertising and PR agencies, including their relatives up to second degree of consanguinity or affinity.

III- The contest has two (2) major categories :

· PROFESSIONAL:

1. Open category - 15 yrs old and above, birth date should fall on or before December 31, 1995. Gundam enthusiasts who are amateur modelers or have already joined the previous Gundam model kit contest, willing to compete with professional Gundam modelers.

2. Junior category - 14 yrs old and below, birth date should fall on or after January 1, 1996. Gundam enthusiasts who are amateur or have already joined the previous Gundam model kit contests, willing to compete with Junior Gundam modelers.

· NEW CHALLENGER:

1. Open category - 15 yrs old and above, birthdate should fall on or before December 31, 1995 Gundam enthusiasts who never joined any of the previous Gundam Model Kit Contests.

2. Junior category - 14 yrs old and below, birth date should fall on or after January 1, 1996. Gundam enthusiasts who never joined any of the previous Gundam Model Kit Contests.


IV- Special Categories:

· EXPERT: - Open to expert modelers, to include previous top 3 winners in the past Gundam contest.

· GROUP: - Open to all, group must have 3 or more members.


V- Interested participants can paint, remodel, modify, or create a diorama using Bandai official Gundam model kits including SD/BB. All participants may pass their entry either in DIORAMA or SOLID MODEL KIT form. Maximum size of entry is L50cm X W50cm X D50cm. MAXIMUM OF THREE ENTRIES PER PARTICIPANT IS ALLOWED.


VI- Entry form(flyer) will be available at the following:

1. Toytown Stores Stores

2. Bankee Trading Inc. website. ( www.bankeepromos.com )

All participants are required to fill up an Entry Form and send us a scan copy at marketing@bankee.com.ph from October 1 to November 3, 2010. Registration number will be provided after the confirmation of entry has made.


VII- Participants should submit their ACTUAL ENTRY for exhibit on November 5 (11am to 8pm) and November 6, 2010 until 5pm at Eastwood, Libis Quezon City. Participants are required to present original Gundam kit boxes for authentication purposes. All entries must not have been used or submitted in any local or international competition. Upon submission of entry, applicants are required to sign a certification form that the entry was made by the applicant himself/herself. Participants shall be provided a copy of entry form to be presented during the judging and claiming of entries.


VIII- Winners will be determined by a panel of judges; judging will start at 2pm on November 7, 2010 at Eastwood Mall Atrium, Libis Quezon City, with a presence of a DTI Representative. Announcement of winners and awarding ceremony will be on the same day after the judging of entries. All participants are encouraged to attend the judging and awarding ceremony, in which all entries can be claimed after the ceremony. In claiming the entries, participants should present a valid ID and a copy of entry form. In a case were the owner/maker of the entry is not available to claim his/her entries and/or prizes, an authorization letter, copy of entry form and a valid ID should be presented before the organizer shall release the entries and/or prizes and being claimed. If entries and/or prizes are not claimed after the announcement of winners, participants will be notified through registered mail. Unclaimed entries and/or prizes can be claimed at the Marketing Department of Bankee Trading Inc. Head Office #6 Rest Haven St. SFDM Quezon City; a valid ID and a copy of the entry form is a must to claim the entries and/ or prizes.

· CRITERIA for JUDGING (BANDAI MODEL KIT WORLD CUP Point System):

Open , Junior, Group & Expert Category:

1. Painting skill 100% Line painting, Body decoration

2. Modification 100% Use of other parts
, Remodeling

3. Creativity 100% Originality (Pose, Color & Concept) Total Look of Diorama

TOTAL 300%

- Prizes are transferable but not convertible to cash or in any other form.

- Unclaimed prizes and/or entries within (60) days from notification shall be forfeited in favor of Bankee Trading Inc. with prior approval from DTI. Grand prize winners from Professional category must bring their actual entry and should secure travel documents (one month prior to the actual date of competition in Hong Kong); other related expenses shall be shouldered by the winners. The trip is valid only during the BANDAI MODEL KIT WORLD CUP 2010 FINALS competition in December.

For more info please dial 407-8299 or visit our website www.bankeepromos.com or e-mail us at marketing@bankee.com.ph

Per DTI NCR Permit # 4527 Series of 2010

Sunday, September 05, 2010

Wing Love


It appears that Gundam Wing is getting some brand new love and attention.


Gundam Wing was the very first Gundam series that aired in the Philippines. But I was already aware of the anime even before it aired locally because actually saw a few episodes during a visit to Japan when I was a kid.
I loved it for the fact that it was about giant robots, and then I also got hooked on the opening song "Just Wild Beat"! I was very happy that a local channel aired the series here, and I believe that is how the rest caught up with the gundam hoopla. My first two kits were the 1/144 Wing and Shen Long. After assembling the kit, I felt like I was ripped off because the toy doesn't look anything like the images shown on the box. But still, I was happy to have the gundams of the two best pilots (in my opinion), Heero and Wufei.

I can still remember spending an awful lot of time staring at gundam boxes in convenience stores and malls during our stay there. I was intimidated by the 1/100 kits and didn't bother asking my mom or sister to buy me one.

I'm glad that Bandai is showering GW with a lot of attention recently. The MG Wing first, then now the Deathscythe. So according to Ngee Khiong, the design of the MG Deathscythe was based from the new Wing manga series "The Glory of the Defeated", and it is possible that the other 3 units will be released based on the new manga design as well. Wing looks like the MG Ver. Ka release so I guess no more future MG release for that. Shen Long looks like the old school design, and Sandrock looks like the one from EW. Heavy Arms appears to be the EW "Kai" version, but is using the old school color scheme. The Heavy Arms is my favorite unit from Wing. I got the 1/100 HG version, and I'm having big plans for that old kit.

I really like the grunt units from GW as well, and I hope Bandai would release MG versions of some of those mechs. My favorites are the Aries and Virgo. Maybe the Aries can be a transformable kit, and the Virgo can have shield effect parts for the shield discs on its shoulder. Or better yet, a Mercurius and Vayeate combo in a single box.

So there, I'm really excited about the future gunpla releases for the Wing series. I'm also excited for my first airbrush project which is the HG GN-X. I shall post updates about that soon.

Sunday, August 22, 2010

First Airbrush. Alternative Compressor.


I've always wanted an airbrush set. I guess everyone who is into gunpla or plastic kit modeling in general would think the same way too. I always thought that it would be easier than using spray cans, more economical in the long run, and of course it can make your project look way cooler. So yesterday, I decided to get myself the Tamiya basic airbrush.

It costs about 42 USD. The package includes the airbrush, the gravity feed cup, small wrench for assembly/disassembly, and the manual. It doesn't include the hose and connector so I bought one too.


I think they gave me the wrong hose, it was too narrow. The black thing that you connect to that round metal can't get inside the hose. The store clerk told me it was the only kind of hose they have. Good thing there was a pet store in the area and I was able to buy an aquarium hose. Inside the car, I tried to insert the black "pin" with the rounded metal into the hose and it fit nicely.

The tough choice to make about getting this airbrush was between getting just the basic airbrush, or the basic airbrush set which has a Tamiya Compressor. I actually checked out the compressor set in the store, to see how everything looks like. I was surprised that the compressor itself was so light. In the end, I decided to just get the airbrush. I was being a cheap bastard so I wasn't really willing to pay extra for the compressor set which costs about 130 USD. I KNOW, and it took me a long time to convince myself, that I already have a compressor at home and it has been with us for years now.

Drum roll. This is the compressor I was talking about. This is actually a medical equipment called a Nebulizer. I have asthma, actually almost everyone in my family, that is why we have this. The nebulizer itself is actually a small cup/container where you put the medicine that has to be vaporized for inhalation. I heard from someone that the machine putting out the air to turn the medicine into vapor is actually called a compressor. From then on, I had the idea that if I could connect this to an airbrush, then I just might have the painting equipment I need to reach gunpla-making heaven.

I googled. I stumbled upon a forum dating back to 2005 about a guy who used his son's nebulizer to replace the broken compressor he had to reach a deadline for a commissioned work (i think). I also tried to look for the specs of my nebulizer, and one site claims that it has a max output of 29 psi. Whatever that means. I just knew that if that info is correct, this little equipment would actually be enough to supply air for an airbrush. So I got home nervous and excited. Assembled the hose and airbrush, took out the compressor, and connected the hose to the equipment. I was relieved and so happy to feel air coming out at the end of the airbrush. I found out online before deciding to buy that this type of AB has continuous airflow. You just pull the trigger to let the ink out. I was totally surprised because the air coming out was a bit too strong. Without a hose connected to the compressor, the air coming out of the machine wasn't really that strong when I put a finger in front of the air outlet. And that actually made me re-think my decision at first to not get the AB with the compressor set.

I had things to do so I didn't try to paint with it right away. This afternoon, I got the chance to test the AB with the C (get it?). At first I didn't get the right mixture of thinner and paint. Too much thinner, too little paint to be exact. The air coming out was a bit too strong and I can actually see some paint being blown off the plastic runner. I decided to add more paint. The flow was actually better, but still a bit too strong. For this, I decided to cut a hole in the hose to let some air escape before reaching the AB.

I have also read about Aquarium Pumps being used as an alternative for air source. This blogger, had four connectors attached to his pump, and he opens two or three of them like a faucet to let some air out and it worked (sorry I didn't save the links of those entries). So I made a small hole, turned on the AB, and it was still working fine. The air coming out was noticeably less forceful than before. When I pulled the trigger to let ink out, it was blowing paint more gently compared to the first attempt. Some people out there may raise an eyebrow at this wacky idea, but hey it worked.

I used an illustration board and SD 0 Gundam's runner to test the AB. First I used white ala primer, then gray to see how the coating would look like.


This is the red portion of the runner.

The blue.

And the yellow.

Here are the trial runs done on the illustration board. You set the trigger sensitivity by moving the red slider on top of the AB. The leftmost line was done with 3 strokes/coatings. After one line I adjust the slider to let more ink out. 2nd and 3rd lines done with 2 strokes. 4th to 6th line done with a single stroke.

I have discovered one issue with this set-up. When the compressor is on and air is rushing out of the AB, small amounts of paint actually come out even if I'm not pulling the trigger. I'm not sure if it has anything to do with the compressor's output, or something is loose inside the AB. It's no biggie, but I do think paint gets wasted due to that, and I have to be careful where I point the AB even if I'm not pulling the trigger. On the bright side, I think it'll be nice to do post shading when painting the armors or other stuff due to the very small amount of ink being blown out.

So that was it. I'm pretty happy that so far things worked out for this wacky idea. I know I need a lot of practice, I need to learn more stuff about airbrushing and how to actually apply them to my projects. Sorry for the lengthy post. It has been awhile since I last posted something here. I'd probably practice airbrushing on SD 0 and HG GN-X. I'll post updates whenever I can. If you have questions or tips for me, please leave a comment. I could really use some advice, especially from experienced modelers if they happen to stumble upon this entry.


Sunday, June 06, 2010

HGUC Blue Destiny Unit 1

DSC09728

The weather finally became tolerable and I was able to do the shoot for Blue Destiny. Summer here in the Philippines has been like a punishment. Thankfully it's been raining for the past few days. I took advantage of the rainy morning and proceeded with the shoot. So here is BD Unit 1. Photo dump after the jump.

DSC09647

DSC09650

DSC09655

DSC09658

I sliced the green foil stickers to tiny bits and pasted them on the eyes/lenses.

DSC09660

DSC09661

DSC09666

DSC09663

DSC09681

DSC09689

DSC09701

DSC09693

DSC09703

DSC09708

DSC09714

DSC09723

DSC09713


Pardon the blurry pics. Been struggling with my Sony point and shoot due to the vibrating lens, really weird.

This was a really nice kit. I only spray painted the light blue and the grey inner frame-ish parts. Slapped on custom decals to make it look more like a GFF model, then topcoat. Since I'm a fan of these 1/144 kits, I'm really excited about the new 1/144 Real Grade line. The color accurate parts and inner frame attributes of a Master Grade model realized in 1/144 scale. Can't wait
!

Tuesday, February 23, 2010

MG Red Frame Kai

Today is Feb.23. The release date of the MG Astray Red Frame Kai is on the 25th. Very much surprised to see this bad boy available in my local hobby store today.


Done paiting HGUC Blue Destiny. SD 0 has been primed. Haven't touched MG Victory obviously. I'm seriously lusting over the Red Frame right now.

(Nothing Follows)


Sunday, January 24, 2010

Finally. Victory!

DSC09457

And a lotta other stuff too.

So I went to Greenhills yesterday, the place where Otaku and other geek stuff can be found, to get this baby.

DSC09452

I got an email from the owner of a store that the MG Victory was already here. So Friday, while at the office, I called their Makati City branch to ask how much it costs. They say its about 41.50 USD, then less 5% if I pay for it in cash. Great. The next day, I decided to go to Greenhills, San Juan instead so I can also check out the stuff from the other stores. I was surprised to find out that Victory there costs more than 46 USD. I didn't tell them that I called their other branch the day before. So I went out, called the other branch and asked about the price. It was still cheaper than the one in Greenhills, so I asked them to keep it for me and promised to pick it up that afternoon.

DSC09459

Found this cute Banpresto figure of Alphonse. I already saw this in the store's website before and got interested. Looks kinda nendoroid-ish.

DSC09467

Went to the other store and found some K-ON Gashapon set. I think it was called Petit Prop Plus. I think these stores can sell them much faster if they allow customers to purchase one blind box instead of an expensive full set. A single box is lighter for your wallet than buying a sealed box set/case. Bought this set of capsule Kenshin toys, popularly known in the english sub as Samurai X.

DSC09462

Check out Kenshin! The first set they handed to me had Kenshin wearing blue. Good thing I checked the other set. The pink version was better than the blue, which is his battousai color I believe.

DSC09463

DSC09465

The Akatsuki Couple, Pain and Konan. The two I wanted so badly to get from the capsule machines.

DSC09460

I got really lucky because the machines in one store were being refilled, so they were open. I asked if I can choose what I want since the machines are open. So the dude with the magic key and bags of capsules helped me out. Finally, I don't have to spend so much trying and hoping that the machines will spit out either of these two.

DSC09469

I should have asked the guy to tell me the days or schedule when the machines get opened =). Here is the current set-up on top of my PC station.

DSC09473

DSC09474

DSC09476

DSC09477

So after the adventure in Greenhills, I went to Makati to get Victory. I think I have to finish Blue Destiny and SD 0 before I can start with my first Version Katoki kit. It has been really really long since last I built an MG model.